
Yesterday we were so excited to see our DIY concrete magnets tutorial feature in Canberra Times’ nest magazine! Fridge magnets are generally so boring… or let’s be honest, tacky! This tutorial puts a chic and contemporary spin on the humble fridge magnet. They are so easy to make and can be customised to suit your personal aesthetic. For example, you could use different shaped moulds or add oxide to the concrete to give it a muted colour.
We’re sharing this fun DIY on our blog for those of you who couldn’t get your hands on a copy. So keep scrolling to find out how easy it is to make cement magnets at home.
Related article: Personalised stump table
Related article: Patrick’s nursery features in Minty magazine!

Why we love concrete magnets
These fun DIY concrete magnets are practical and stylish, even if we do say so ourselves! Concrete is trending on the home interiors scene and now you can bring this look into your home with this quick and easy DIY. These magnets perfectly suit industrial or contemporary style homes. But there’s no reason why you couldn’t adapt the tutorial to suit your individual style.
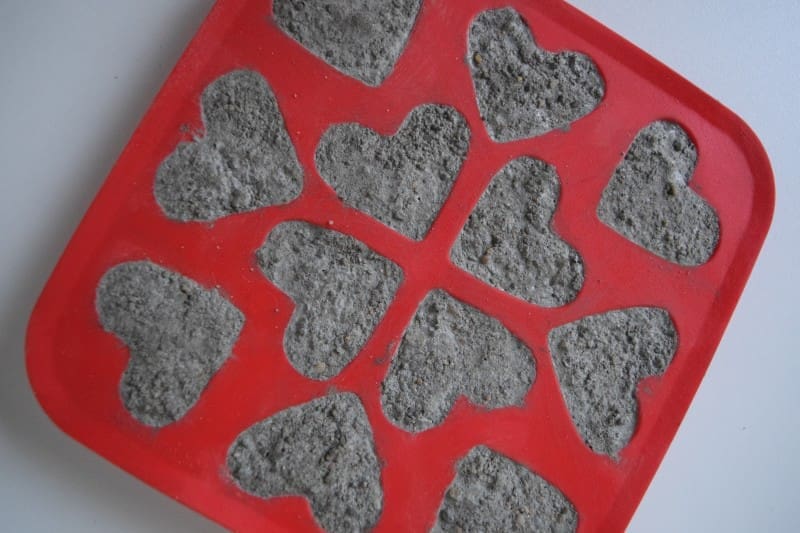
This tutorial uses silicone ice cube trays to set the cement — these trays are available in all sorts of shapes and even letters so why not get creative?
Items you will need
- Silicone ice cube tray in your choice of shape
- Cement
- Sand
- Water
- Bucket
- Stirrer
- Magnets
- Superglue
- Paint (we used Haymes ‘Charlotte’ pink and ‘Real Copper’)
- Paint brush
Steps:
1. Mix up a small batch of cement following the instructions on the packet (generally 1 cup cement to 1 cup sand and ½ cup water).
2. Once you have a smooth consistency, spoon the cement mixture into your ice cube tray. Allow to dry for 24 hours.
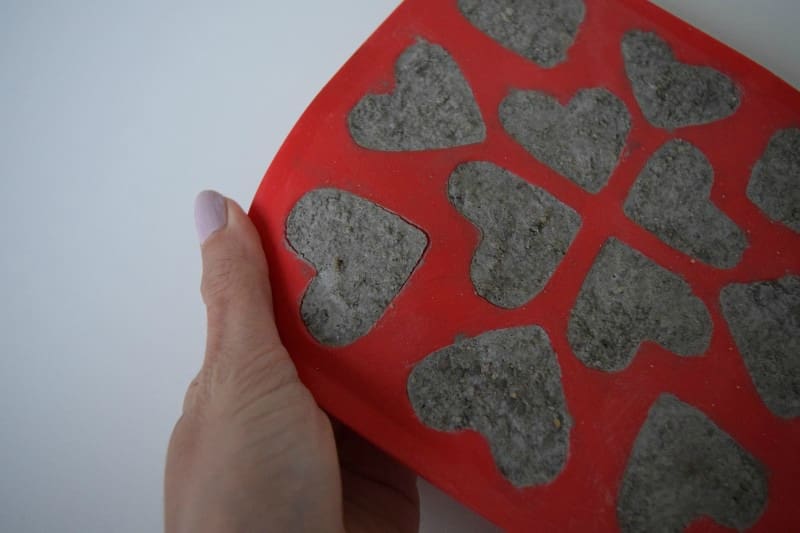
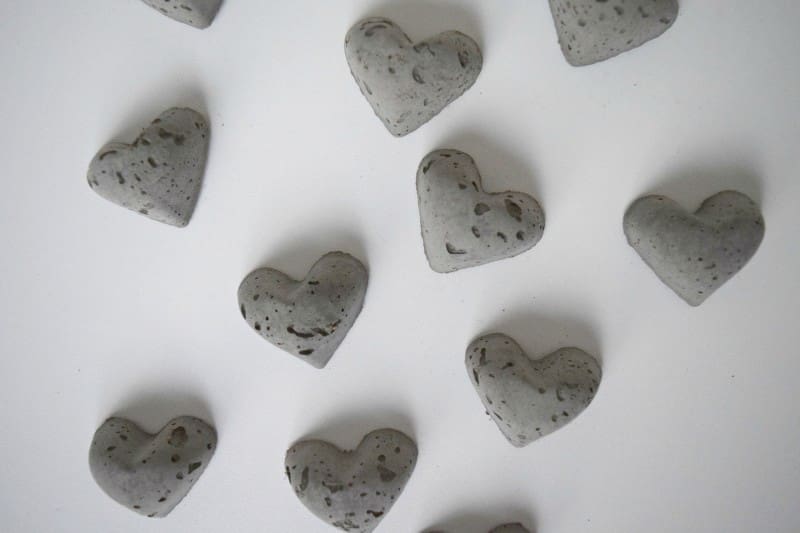
3. Carefully pop the cement shapes out of the tray. You can lightly sand them to remove any imperfections.
4. Paint or decorate your shapes however you like.
5. Finish by gluing a magnet to the back of each shape.

Tips:
- If your ice cube molds are large enough, you may want to gently press the magnet into the wet cement so it sits flush against the back. Note: this only works with large shapes as the cement needs to have at least a 3mm edge around the magnet to avoid cracking.
- Create a dip-dyed look by using masking tape around the cement shape and only painting the bottom half.
What do you think of this fun and inexpensive craft idea? Tell us in the comments below!


